How to Make Your Own Frozen Flatbreads

How to Make Your Own Frozen Flatbreads
If you’re on the hunt for ideas for a family– or friends–night-in activity, try these DIY flatbreads on for size! In addition to being absolutely delicious, they're also both fun and interactive (a bonus for kiddos and newer friends). Eat them night-of, or pop them in your freezer for an easy meal down the line (when shopping and prepping ingredients, be sure to over-buy, then throw together a few extra mini flatbreads to freeze for a future dinner—or lunch). "Future you" will be thankful to have healthy, homemade, plant-based meals at the ready in minutes.
If you plan to go the freeze first route, here are a few tips for success:
When shopping and prepping ingredients, be sure to get extra of everything and throw together a few extra mini flatbreads to freeze for a future dinner—or lunch... or midnight snack. Trust us, you’ll be thankful later to have a healthy, homemade, plant-based meal at the ready in minutes. Plus, chances are your flatbread will be healthier than what you might otherwise find in the freezer aisle (hello, whole wheat crust!), and you’ll likely save a little bit of money doing it yourself.
Frozen mini flatbreads are also a great meal to share with friends or family who may be in need of a dinner—perhaps they have a new baby or an ill family member. Simply prepare the frozen flatbreads, wrap them up in plastic wrap and aluminum foil, and drop them off with a sticky note with baking instructions. You could throw in a simple side salad of mixed greens, a simple salad dressing (maybe one that could double as a crust dipping sauce), and their drink of choice for good measure.
- Double-wrap the flatbreads. That’s right—you’ll want plastic wrap and aluminum foil. This will protect them from getting freezer burn so you can still have a stellar pizza when you take it from freezer to oven to plate 3 months later. Looking for more safe-freezing guidance? Check out our Guide to Freezing Vegetables at Home.
- Pre-freeze on a cookie sheet, if time allows. It’s not a must, but if you can swing it, transferring the pizzas un-wrapped onto a cookie sheet and into the freezer to firm them up first is worth it. This way when you go to wrap them in the plastic wrap, the cheese and other toppers are that much less likely to stick to the plastic wrap. This step is not a dealbreaker, but could save you a little bit of headache when you're ready to eat.
- Cook from frozen. Just like the boxed frozen varieties you buy in the grocery store, you’ll want to unwrap these and transfer them straight into the pre-heated oven while they're frozen– not thawed.
And, now, for the recipes! Both of these are extremely flexible, meaning you can easily swap ingredients in and out depending on what you have on hand or your taste preferences.
For the Peach & Blue Cheese Flatbread, any stone fruit would work in this recipe: Plums – or even pitted and halved cherries – would both be delicious here. Or, use a combination of multiple stone fruits.
For the Corn & Tomato Flatbread, diced and sautéed zucchini or eggplant would be a great substitution for either the corn or tomato.
You can also make one larger flatbread instead of 4 mini flatbreads. The cooking instructions will be the same for a single, large flatbread, but use your judgment on the toppings—you may want to dial back slightly on the cheese, or even some of the other toppings, as well.
Want to make these recipes vegan? Eliminate both the blue cheese and goat cheese and bump up the amount of vegan mozzarella cheese you use. We tried several brands of vegan, pre-shredded mozzarella when testing these recipes and all yielded tasty, melted, cheesy flatbreads. That said, if you go the vegan route, both flatbreads will need another flavor to make up for the fact that you’re ditching the more flavorful non-vegan cheese. For the stone fruit flatbread, consider adding a drizzle of balsamic glaze once you’ve pulled it from the oven, but before serving. For the corn and tomato recipe, be sure to add basil before serving, as well as some freshly ground pepper.
Lastly, the core elements of this recipe work for any flatbread, so feel free to use it as a guide and get creative with your favorite toppings. Flatbreads also go beyond lunch and dinner—try a breakfast pizza or a dessert flatbread; or pull one of these from the freezer for a hearty after school snack. The beauty of making your own flatbreads at home is that you can play around and get as customized as you'd like. Looking for somewhere to start? Here are a few more suggestions we like:
- Classic marinara with mozzarella¬– or vegan– cheese is a great base for future flatbreads where you don’t know who you’ll be cooking for. You can easily add customized toppings right before you slide them in the oven. Think sweet or spicy peppers, mushrooms, tomatoes, garlic– the world is your oyster! Prep the base ahead of time and bring them out for a frozen pizza party!
- Barbecue sauce, plus some corn and caramelized onions is a zesty adult flatbread flavor combo. For a vegan take on barbecue chicken pizza, add some jackfruit. You can easily find jackfruit packaged up (and sometimes, already seasoned!) at your local health food store.
- Spread a thin layer of pesto on your crust; then sauté diced broccoli and mix with a combination of cheddar and mozzarella or your favorite vegan cheese for a green pizza.
- Make a breakfast pizza: use your favorite cheese, or a combination of two cheeses, add sliced asparagus, crack an egg on each mini pizza, and when they come out of the oven, sprinkle on freshly-chopped chives.
- Craving dessert? Top your pizza with mascarpone, and fresh berries (we like a combination of blueberries and blackberries) for a sweet flatbread. You could even sprinkle on a little bit of turbinado sugar for added crunch and a touch of sweetness.
Serves 1
Individual Peach & Blue Cheese Flatbreads
Ingredients
- 1 lb. whole-wheat pizza dough, or this recipe, at room temperature at least 1 hour
- All-purpose flour
- 2 peaches or nectarines, pitted and sliced
- 8 Tbsp. crumbled blue cheese (skip for a vegan version)
- 1 cup shredded mozzarella cheese or vegan mozzarella cheese
Directions
- Preheat the oven to 450°F. Arrange a rack in the top third of the oven, place a baking stone or baking sheet on the rack, and heat to 450°F.
- Divide the pizza dough into 4 even portions to make 4 individual pizzas. On a floured surface, roll it out to your preferred thinness. Transfer to the oven, 2 at a time and cook for 3 to 5 minutes, or until the underside is slightly crispy, and barely browned. The top will be puffy, dry to the touch, and pale in color.
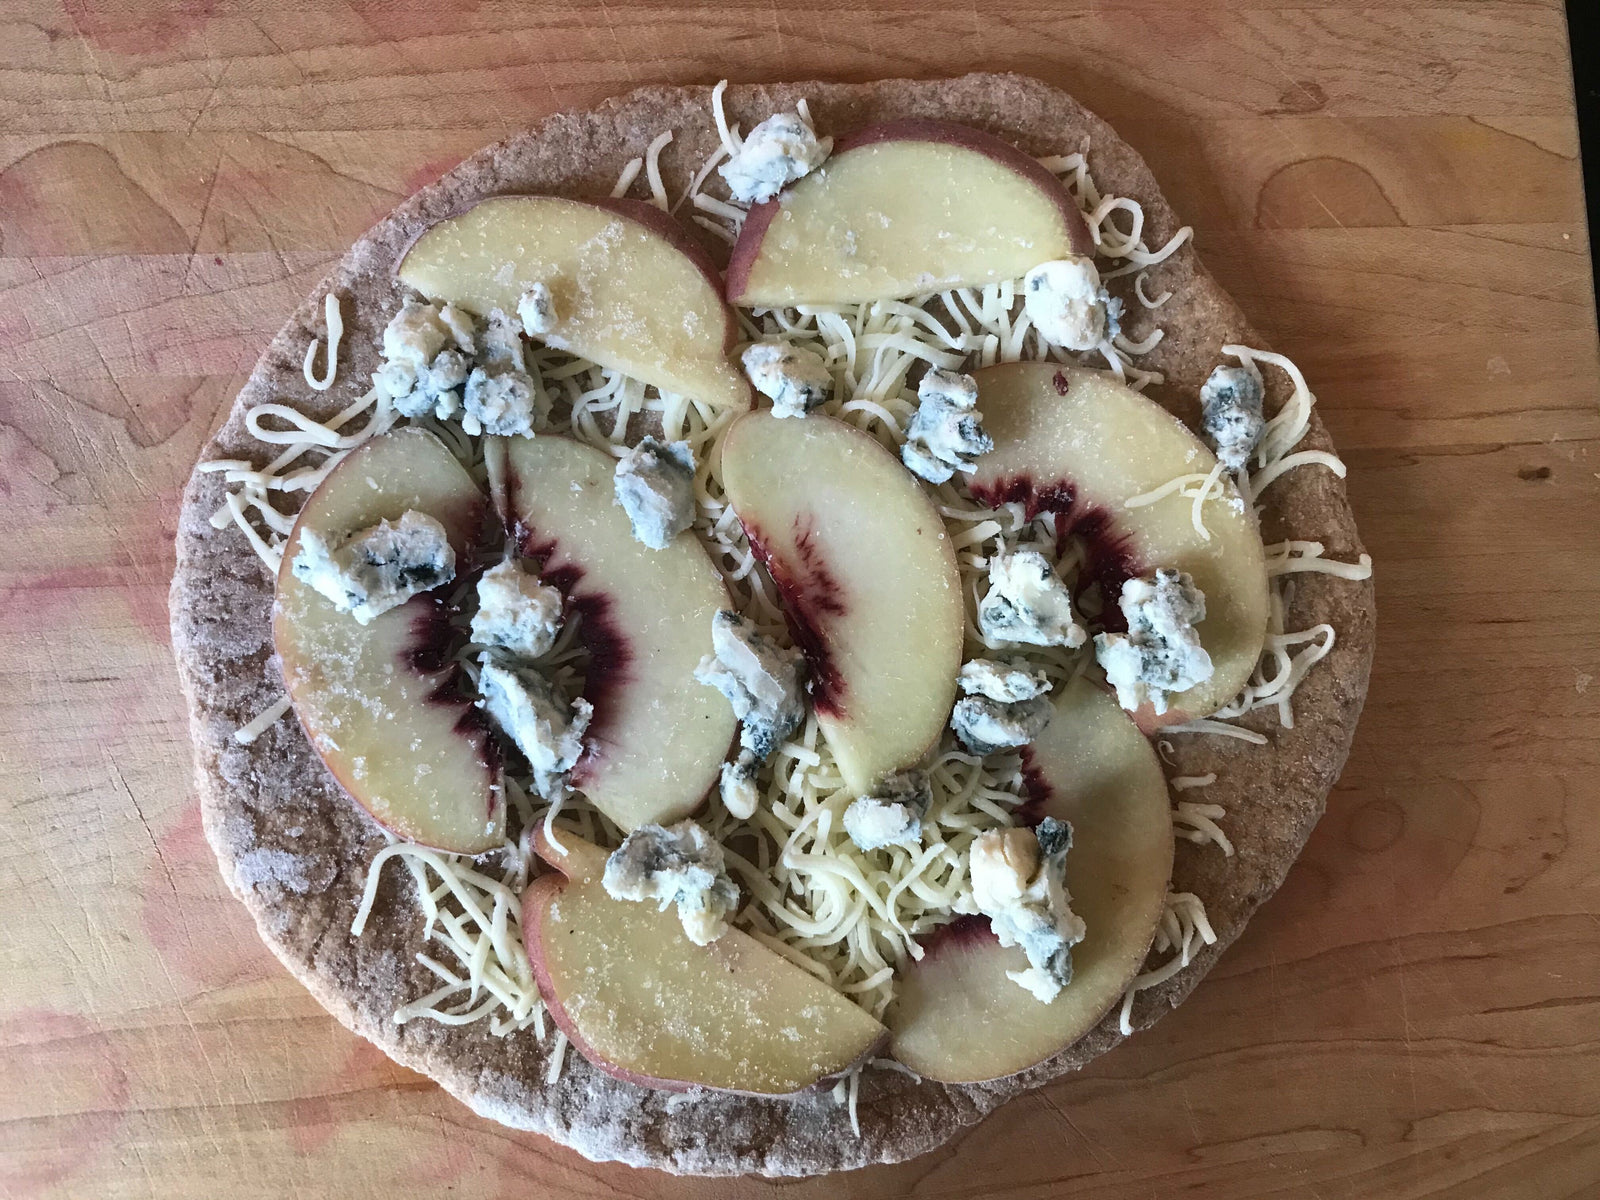
- Remove the crusts from the oven and let them cool completely. When cool, flip the rounds over so that the crispier bottom is on the top. Top each pizza with equal amounts of pizza toppings: mozzarella on the bottom, followed by sliced peaches (or nectarines), then sprinkle with blue cheese.
- If freezing, wrap par-baked and topped pizzas individually in plastic wrap first, then aluminum foil. Transfer to freezer. Freeze for up to 3 months and follow instructions below for final cooking step before serving.
- If cooking to eat now, transfer topped pizza crusts to the oven and bake for 5 to 7 minutes until the crust is browned and the cheese in the center of the pizza is fully melted. Let cool a few minutes, slice, and serve.
How to Freeze Your Peach & Blue Cheese Flatbread
Wrap the pizzas in plastic wrap, then aluminum foil, and transfer to freezer. Freeze for up to 3 months. When ready to bake the pizzas, heat the oven to 500°F. If you have a baking stone, place it in the oven as it heats. Unwrap the pizzas and transfer to pre-heated oven. Bake until the crust is browned and the cheese in the center of the pizza is fully melted, almost bubbly, 12 to 15 minutes. Let cool a few minutes, slice, and serve.
Serves 1
Individual Fresh Corn & Cherry Tomato Flatbread
Ingredients
- 1 lb. whole-wheat pizza dough, or this recipe, at room temperature at least 1 hour
- All-purpose flour
- 1 ear fresh corn
- 1 pint cherry tomatoes, halved
- 2-3 ounces soft, spreadable goat cheese (skip for vegan version)
- 1 tsp. olive oil (optional)
- 1 cup shredded mozzarella cheese or vegan mozzarella cheese
- ¼ cup fresh basil, cut into ribbons (optional)
Directions
- Preheat the oven to 450°F. Arrange a rack in the top third of the oven, place a baking stone or baking sheet on the rack, and heat to 450°F.
- Divide the pizza dough into 4 even portions to make 4 individual pizzas. On a floured surface, roll it out to your preferred thinness. Transfer to the oven, 2 at a time. Cook for 3 to 5 minutes, or until the underside is slightly crispy, and barely browned. The top will be puffy, dry to the touch, and pale in color.
- Remove the crusts from the oven and let them cool completely. When cool, flip the rounds over so that the crispier bottom is on the top. Top each pizza with equal amounts of pizza toppings: spreadable goat cheese on the bottom, followed by corn and tomatoes, then sprinkle with mozzarella. If goat cheese is hard to spread, thin with olive oil first, then spread on crust.
- If freezing, wrap par-baked and topped pizzas individually in plastic wrap first, then aluminum foil. Transfer to freezer. Freeze for up to 3 months and follow instructions below for final cooking step before serving.
- If cooking to eat now, transfer the topped pizzas to oven and bake for 5 to 7 minutes until the crust is browned and some of the feta is a touch golden. Let cool a few minutes; top with basil, if using; slice and serve.
How-To Freeze Your Corn & Cherry Tomato Flatbread
Wrap the pizzas in plastic wrap, then aluminum foil, and transfer to freezer. Freeze for up to 3 months. When ready to bake the pizzas, heat the oven to 500°F. If you have a baking stone, place it in the oven as it heats. Unwrap the pizzas and transfer to pre-heated oven. Bake until the crust is browned and the feta is slightly golden, 12 to 15 minutes. Let cool a few minutes; top with basil, if using; slice and serve.
Comments